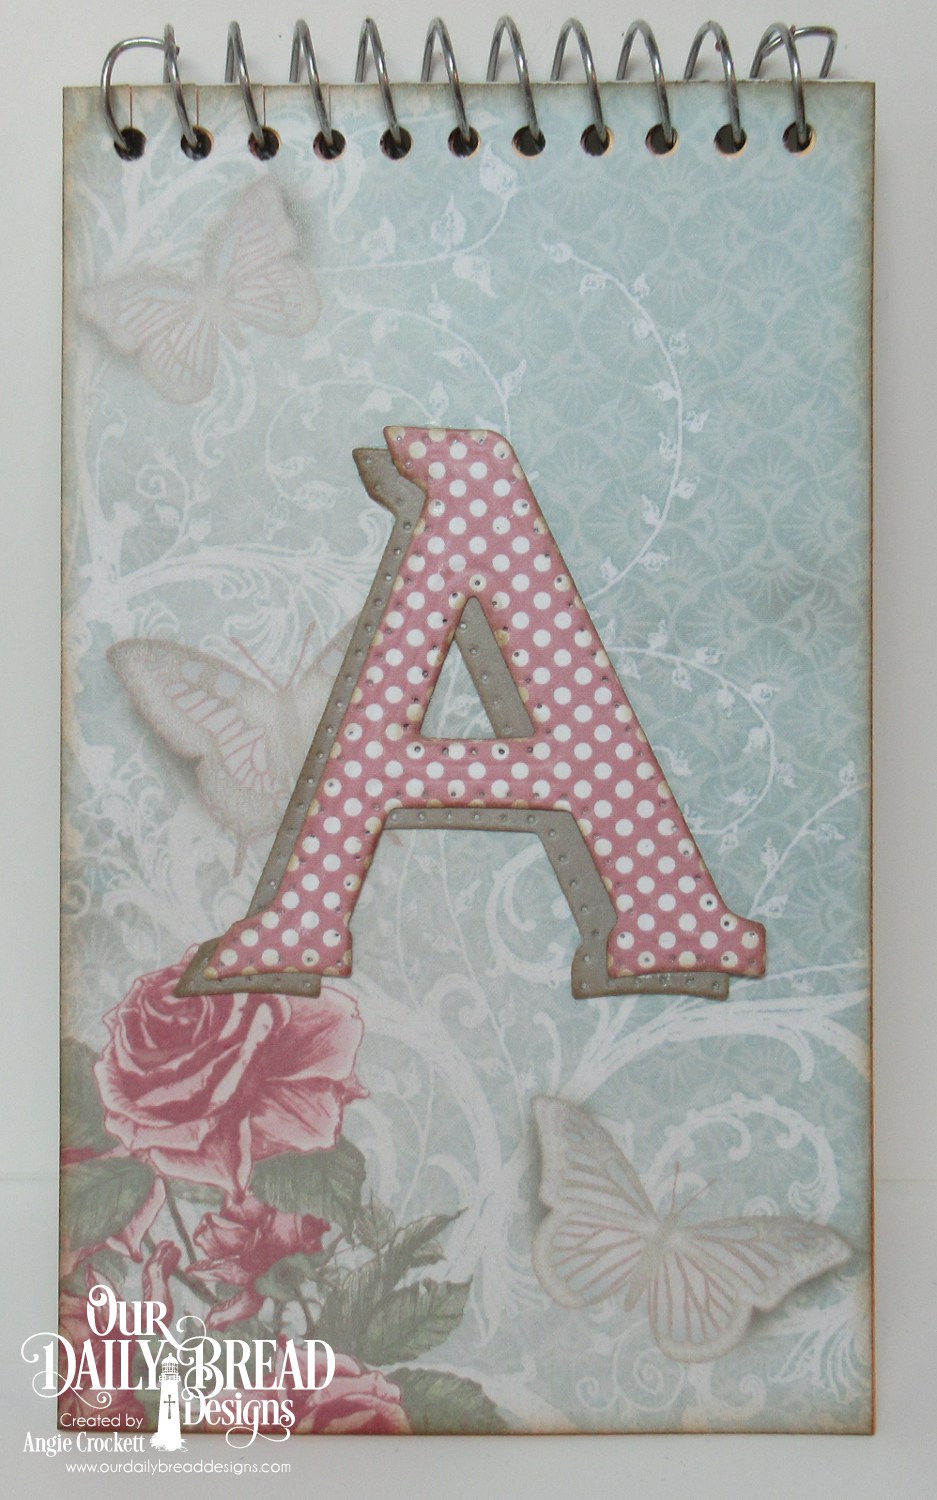
Hi, everyone! Welcome to the November New Release party for Our Daily Bread designs! Since there was an early pre-order sale on the November Bundles, you have probably seen all of the new goodies for this month, but if not, check out this post on the ODBD Blog to see them all, along with some amazing designer samples.
Here are the ODBD items used in my card sample for today:
I don't know about you, but pink poinsettias are my FAVE! The traditional red and the elegant white varieties are gorgeous, but there is something about the pink ones that really get me! So, of course I had to color my poinsettias light pink. The poinsettias and scripture verse are from the 'Joyful Christmas' Stamp/Die Duos set; the yummy designer paper is from the ODBD Christmas Paper Collection 2018. The other dies used here are the ODBD Custom Quilted Background Die, ODBD Custom Double Stitched Circles Dies, and the ODBD Custom Circles Dies. Three pink pearls and a baker's twine bow were added as simple embellishments.

Here is a helpful tip when using any of the ODBD quilt dies. Cut a cardstock panel a smidge smaller than the quilt frame, make a sticker out of the panel by using a Xyron sticker maker (or by covering the entire surface with adhesive). Carefully adhere the die-cut frame, then place the inside pieces within the frame and press down onto the sticker surface. This is the most efficient way I've found so that each individual piece doesn't have to be glued down one at a time. When finished, make sure to go over each section and press down to make sure they are adhered well. For a quick photo tutorial, see this post. Have fun!
Thanks for visiting!
Blessings,
Hi, everyone! My card today combines this week's Inspiration Challenge (I chose this beautiful autumn quilt from Studio E Fabrics) plus this week's Friday Free4All Challenge is to make either a Halloween or a fall themed card. Since I do not celebrate Halloween, I chose to make a Thanksgiving card using the ODBD Custom Quilted Background Die, ODBD 'Follow the Son' Paper Collection, ODBD Custom Double Stitched Pennant Flags Dies and the 'A-Maize-Ing' stamp set and ODBD Custom Indian Corn Die.When I use any of ODBD's Quilt Dies, I love to use my Xyron Sticker Maker which makes adhering the inset pieces a breeze! Check out my instructions below:
First, cut a cardstock panel just a smidge smaller than the die cut frame of whichever quilt die you are using. Run it through a Xyron Sticker Maker machine. (Note: I usually use the same color paper as the quilt frame but for this tutorial, I used white so that it's more visible for photos.) If you don't have a sticker maker, you could use your snail adhesive but make sure you cover the entire surface so that none of your die cut pieces fall out later.
Once your sticker is made, peel off the backing and adhere the quilt frame to the panel.
Lay out all of the coordinating die cut pieces of the chosen patterns or colors so that it's easy to locate and insert the pieces. Make sure you have a good fit before pressing each piece onto the sticker background. Tip: When using multiple colors to fill in your quilt, try to use the same order all the way around the quilt and pay attention to the pattern so that you don't have two of the same colors next to each other.
Once the quilt is complete, press down on the frame and pieces to make sure they are all adhered well. Now it's time to decorate!
For my card sample, I have used the 'A-Maize-Ing' stamp set and ODBD Custom Indian Corn Die. I wanted to used a stitched die for the sentiment to coordinate with the quilt die, but I didn't have the right size.......so......I used the die-resizing technique to create the perfect die cut. Here is how you can make any size panel you want:
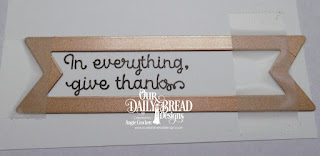


I stamped my sentiment first, then lined up the die from the ODBD Custom Double Stitched Pennant Flags Dies on one side of the sentiment. Removable scotch tape was used to hold the die in place then ran through my die cut machine. The panel was removed from the die, then lined up on the other end and taped down. (Note: if using pierced or stitched dies, make sure that the holes or the stitches line up or your finished die cut will look messy.) *****Important: when making your second cut, you only want to cut just the edge, so roll the plate just a bit and then reverse so that only the end of the panel cuts. You may emboss these types of cuts as well, just place the embossing mat and plate over half of the panel at a time.
Here is my finished card:
Thanks for visiting!
Blessings,
Hi, everyone!
Thanks so much to Chrisd, Maxine, and Robyn, for commenting on last week's "How To Create a Bookmark with Any Die" post! I have a craft room FULL of crafting supplies (and lots of hand-made cards), so I would like to reward all three of you! Maxine and Robyn, I have your addresses already, but Chrisd, please send me an email to angelladcrockett at yahoo dot com. (Note: I spelled it all out so that spam generators wouldn't pick it up as easily!)
Thanks again, ladies! I'll be rounding up your goodies later in the week and will probably ship them out on Monday.
Blessings!
Hi, everyone! Today I would like to share how to create a bookmark or tag out of any open centered cutting die. For my bookmark sample, I have used the largest die from the ODBD Custom Vintage Labels Dies.
The first step is to choose a die with an open center which will be the top of your bookmark or tag; measure the inside edge of the die. For my bookmark, I cut a piece of cardstock which was 2-1/2 inches wide.
Next, place the top of the cardstock through the center and under the cutting side of the die. Line up the sides evenly and tape down. Once the die is run through your cutting machine, only the top of the panel will be cut.
Trim the bottom to your chosen length and round the corners if desired. Punch or die cut hole or slot in the top so that you may add ribbon, cording, etc.
Here is the finished bookmark which was featured in the new release post this month for Our Daily Bread designs. The products I used along with the Vintage Labels Dies are 'His Timing' (Bible Journaling stamp), the clock image from 'Time', and the ODBD Custom Circles Dies. Once the bookmark was stamped and sponged, it was adhered to gray cardstock; the straight edges were trimmed with a cutter and the shaped edges were trimmed by hand.
Here is a bookmark created earlier this year with the same die set with the 'Your Heart' Bible Journaling stamp.
Thanks for sharing your day with me! Anyone who comments on this post by Friday, Jan 6, will have a random chance to win some goodies! Please make sure that I will be able to contact you either through your blog or email.
Blessings!
Hi, everyone! This week's Friday Free4All Challenge over at Splitcoast is to include images of clocks in your project. This is a small steno pad which I decorated for my hubby a few years ago when he got a promotion at work. I never got around to posting it, so now is the 'time' (pun intended!). Though the images are very faint, there is a clock image from 'Time' inked in burgundy, 'stamped off' on scratch paper, then stamped directly onto the designer paper. The verse is from 'Scripture Series 2'; the 'Scrolly Borders' set has since been retired.
 If you'd like to see an easy tutorial for altering notebooks like this, please click HERE.
Thanks for visiting with me today!
Blessings,
Happy Saturday, everyone! This week's Inspiration Challenge over at Splitcoast is to find inspiration from the Seaweed Kisses site.....I fell in love with the peach/hot pink color combination of these smash books , so I used these colors to create this altered spiral notebook. I started by cutting a 3 x 5 piece of apricot cardstock, stamped the 'Dresden Quilt Stamp' by Our Daily Bread designs in Stazon Fuschia ink, highlighted parts of the stamp with an apricot marker, created some faux stitching with a pink marker, stamped a sentiment from 'A Time To Mend', then adhered three paper buttons which were cut out with the ODBD Custom Matting Circles Dies set. To match the holes in the notebook, one piece of paper was cut out of the notebook in order to punch the holes in the same places. With scissors, a snip was made for each hole; after adhering the cover, each section at the top was pressed through the wire and adhered to the cover. If you'd like to see a photo tutorial of this easy-peasy alteration, click HERE.

Thanks for stopping by!
Have a blessed weekend!!
Hi, everyone! Today I would like to share another bookmark I will be submitting for the Inspiration Challenge at Splitcoast. I literally gasped when I saw the amazing colors in these bath salts....so gorgeous! I made this with another of the new Bible journaling stamps by Our Daily Bread designs, called 'Your Heart'. Since this stamp was too long to use with the ODBD Custom Bookmarks Dies, I used one of the ODBD Custom Vintage Labels Dies to cut the top of the bookmark only.....see my tutorial on how I did this HERE....this is so easy, you won't believe it! Choose the die with the width you want, cut your paper strip so that it will fit within the die frame, then follow the instructions on the tutorial. Once my strip was die cut, stamped, and colored, I used a corner rounder at the bottom. I traced the top of the die onto aqua cardstock, cut by hand, trimmed the sides with a paper cutter and used a corner rounder for the bottom. This was so quick and easy that I will make more of these to give out at church!

Thanks for stopping by again!
Blessings,
Hi, everyone! This week's Featured Stamper over at Splitcoast is Sue aka gregzgurl.....congrats, Sue!!!! I fell in love with this gorgeous clean and simple thank you card....still needed two simple thank you cards to take on our cruise which we will be going on very soon....yay! On both cards, I used the 'Chalkboard Fan Background' and a sentiment from 'Sentiments Collection' each from Our Daily Bread designs. Each strip was cut at 2-1/2" so that they would fit through the center of the die which I used to cut the bottom only. Once each strip was positioned, I used repositionable tape to hold it in place, then ran through my Grand Calibur for a couple of cranks only and then reveresed it back out, just enough to cut through the end but to keep any die impressions from embossing on the rest of the panel. (See photo below.)

Once each panel was cut, the edges were sponged and sentiment stamped. I was tempted to add pearls or ribbon to the top of each, but chose a small strip of matching cardstock instead.
Thanks for stopping by!!
God bless!!
Hi, everyone! Today's Friday Free4All Challenge over at Splitcoast is all about pot.....haha, wanted to see if you were paying attention!!! I'm talking about flower pots of course....happy spring!!!
I created this magnet five years ago for a Flower Soft Tutorial on the Our Daily Bread designs Blog, but never posted it on my own blog or gallery. I used Flower Soft Gold Peel Off Stickers, Country Taglets, original 'Lilac' Flower Soft, along with 'Raspberry Fizz' and 'Citrus Crush' Flower Soft from the Ultra Fine line, an EK Success Scripture Sticker, and May Arts Satin Ribbon (tied with a Bow Easy).
Thanks for visiting with me!
Blessings,
Hi, everyone! This is a card I made a year and a half ago for the Our Daily Bread designs Blog for a tutorial on the "Faux Pressed Flower" Technique....for supplies used and technique info, see the tutorial here. For some reason, I never got around to posting it to my blog or galleries. When I saw the Color Challenge over at Splitcoast (vanilla, pink, and light green), I jumped at the chance to post the card finally.
Thanks for visiting today!
Blessings,
Happy Saturday, everyone!!!! Today's Inspiration Challenge is absolutely PERFECT to show off more of Our Daily Bread designs' February stamps and dies! Pssst......if you are signed up for the ODBD newsletter, you know that ODBD has already shown the new sets and is offering HUGE pre-order discounts! Check out the deets HERE!
The Inspiration Challenge at Splitcoast is to find inspiration from Integrity Graphics.......I flipped out when I saw this gorgeous prayer journal and used it to create my own altered steno notepad, using the small heart and sentiment from the new "Bless Your Heart" set and ODBD Custom "Ornate Hearts" Dies. The background was stamped with "Brocade Background" red ink on red cardstock and the hearts and sentiment were heat embossed in white. The dotted lines were drawn with a chalk marker against a ruler.
Here is a simple tutorial on how to decorate a steno pad.....I used a small one, but you can do this with any size:
Step one: Using your scissors, cut one page out of the steno pad, making vertical cuts through the tabs because you want to keep this page intact to use as a template.
Step 2: Cut a piece of cardstock or designer paper to the same size as the entire page from the steno pad.
Step 3: Line up the page over your cardstock, hold in place, then punch holes through the cardstock, using the "template" as your guide.
Step 4: If you plan to stamp on your cardstock, this would be the time to do it. I stamped red on red with the Brocade Background stamp.
Step 5: I white embossed the small heart image from the "Bless Your Heart" set three times, then cut them out with the ODBD Custom Ornate Hearts die set. The scripture verse (same set) was also white embossed onto the page.
Step 6: After finishing the embellishments, I used paper snips to cut vertical lines through the tabs at the top. I then added adhesive to the back of the cardstock, including the back of the cut tabs.
Step 7: After lining up and adhering the lower portion to the top of the steno pad, I used the scissors tip to push each tab through the wire and pressed down on each tab to make sure it was adhered.
Here is the finished altered pad........are you ready to give it a try? You will LOVE how easy it is to personalize your own steno pads for yourself or for a gift for someone else!
Thanks for stopping by! Have a very blessed and safe weekend!!