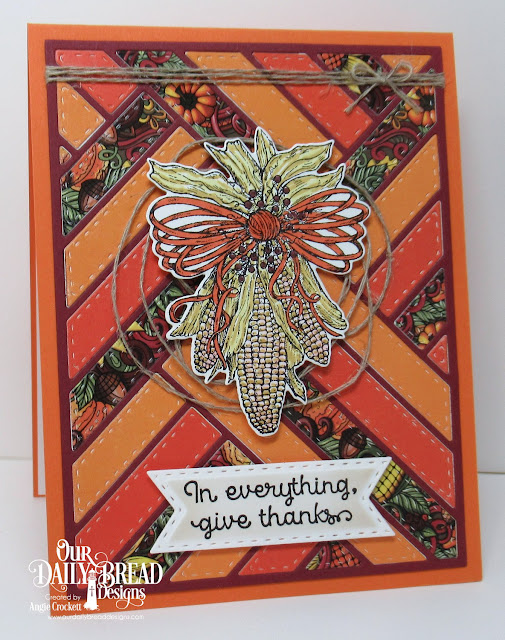
Hi, everyone! My card today combines this week's Inspiration Challenge (I chose this beautiful autumn quilt from Studio E Fabrics) plus this week's Friday Free4All Challenge is to make either a Halloween or a fall themed card. Since I do not celebrate Halloween, I chose to make a Thanksgiving card using the ODBD Custom Quilted Background Die, ODBD 'Follow the Son' Paper Collection, ODBD Custom Double Stitched Pennant Flags Dies and the 'A-Maize-Ing' stamp set and ODBD Custom Indian Corn Die.When I use any of ODBD's Quilt Dies, I love to use my Xyron Sticker Maker which makes adhering the inset pieces a breeze! Check out my instructions below:
First, cut a cardstock panel just a smidge smaller than the die cut frame of whichever quilt die you are using. Run it through a Xyron Sticker Maker machine. (Note: I usually use the same color paper as the quilt frame but for this tutorial, I used white so that it's more visible for photos.) If you don't have a sticker maker, you could use your snail adhesive but make sure you cover the entire surface so that none of your die cut pieces fall out later.
Once your sticker is made, peel off the backing and adhere the quilt frame to the panel.
Lay out all of the coordinating die cut pieces of the chosen patterns or colors so that it's easy to locate and insert the pieces. Make sure you have a good fit before pressing each piece onto the sticker background. Tip: When using multiple colors to fill in your quilt, try to use the same order all the way around the quilt and pay attention to the pattern so that you don't have two of the same colors next to each other.
Once the quilt is complete, press down on the frame and pieces to make sure they are all adhered well. Now it's time to decorate!
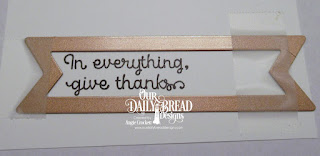
For my card sample, I have used the 'A-Maize-Ing' stamp set and ODBD Custom Indian Corn Die. I wanted to used a stitched die for the sentiment to coordinate with the quilt die, but I didn't have the right size.......so......I used the die-resizing technique to create the perfect die cut. Here is how you can make any size panel you want:
I stamped my sentiment first, then lined up the die from the ODBD Custom Double Stitched Pennant Flags Dies on one side of the sentiment. Removable scotch tape was used to hold the die in place then ran through my die cut machine. The panel was removed from the die, then lined up on the other end and taped down. (Note: if using pierced or stitched dies, make sure that the holes or the stitches line up or your finished die cut will look messy.) *****Important: when making your second cut, you only want to cut just the edge, so roll the plate just a bit and then reverse so that only the end of the panel cuts. You may emboss these types of cuts as well, just place the embossing mat and plate over half of the panel at a time.
Here is my finished card:
Thanks for visiting!
Blessings,


No comments:
Post a Comment