Hi, everyone! This week's Color Challenge over at Splitcoast is to use Red, White, and Blue with the dessert option of 'anything goes'....I choose 'stars'. My co-worker loves the Chicago Cubs, so I created this for his birthday. All of the dies I used are from Divinity Designs LLC: Double Stitched Pennant Flags (Resized), Double Stitched Rectangles, Circles, Letter Board, Alphabet Caps, and Sparkling Stars. The white panel is embossed with tiny stars. The red strip is Real Red ribbon.
Thanks for stopping by!
Hi, everyone! This week's Featured Stamper over at Splitcoast is the amazing Wanda Cullen aka cullenwr....congrats, Wanda!! I chose this awesome alcohol ink card to case today....I love her alcohol ink background and cool layout. For my card, I have used the Globe and Stand Dies (from Divinity Designs) and a sentiment from 'Color My World'. I used a vertical banner since my sentiment was larger, but heat embossed the sentiment as Wanda did on her card. The sentiment was cut with the Double Stitched Pennant Flags Dies using the die resizing technique to shorten the length of the die. Though different dies and colors were used, the overall layout remains. I used gold embossing powder and gold metallic cardstock to bring out the gold tones in the Alcohol Ink Background, which was cut out with the Double Stitched Rectangles Dies set. Foam tape was used on the die cut pieces for added dimension against the background. Tiny stars were cut with the USA Map Dies set, then coated with a clear glaze pen to help them stand out a bit.

Thanks for stopping by today!
Blessings,
Hi, everyone! This week's Sketch Challenge over at Splitcoast is perfect for a spinner card (I flipped the sketch horizontally). I began by cutting a white panel with the Divinity Designs Custom Pierced Rectangles Dies, sponged the water over a piece of scratch paper and sponged the clouds over a template cut with the Clouds and Raindrops Dies. The spinner channel was cut with a flagpole die from the now retired 'Pennants Dies' set, cutting one half at a time using the Die Re-sizing Technique, so that both ends of the slot would be square. The bass and sentiment are from the 'Great Catch' Stamp/Die Duos set; the bass was watercolored and a clear glaze pen was used over the eye. The panel was popped up with foam tape and the spinning mechanism was created with a penny and foam tape, attached to the fish from the back side of the panel. When tilted from side to side, the fish will spin. The Grass Hill Die and Grass Border Die were used to finish the scene.
Thanks for visiting!
Blessings,
Hi, everyone! Welcome to the February New Release party for Divinity Designs LLC (formerly known as Our Daily Bread designs)! To see the whole enchilada (all of the new stamps, stencils, designer paper and embossing folder!) and to find out how to win goodies, check out this post.
Here are the items featured in my three samples today:
For my first card, I have used the 'Miracle of Easter' stamp set, 'Flourishes' Mixed Media Stencil, Scalloped Ovals Dies, Ovals Dies, Lever Card Dies, Lever Card Layers Dies, Fence Die, Grass Lawn Die, and Bitty Butterflies Dies. The mixed media background on each panel was created with two techniques; the first is the 'Wrinkle Free Distress' Technique (swipe ink pads on a craft mat, spritz with water, mop up ink with cardstock); the 2nd is 'Stencil Stamping' (the 'Flourishes' stencil was inked with a plum inkpad, spritzed with water, then pressed onto the Wrinkle Free Distress panel). The lily was stamped right over the inked panel, then colored with markers (leaves) and water-colored (blooms). Two sentiments were stamped onto the oval panel which was sponged in light blue, then matted with the Scalloped Ovals Dies. The fence, grass, butterflies, and baby blue pearls were added as finishing touches.


My second card features the 'Cross' Embossing Folder/Die Duos set, along with the Inspiration Words Dies, Deco Border Die, and Pierced Rectangles Dies. I've always wanted to try the 'Faux Patina' Technique and this awesome embossing folder gave me the push to do it. The flat side of the embossing folder was inked with kraft ink, then embossed with white cardstock. The raised crosses were inked with a sponge dauber with medium aqua ink, then green ink, then dark brown ink. Instead of using gold embossing powder to create the metallic patina, I sponged 'Oldsilver' Inka-Gold on the raised images and buffed off the excess. I'm excited about the outcome and will definitely try this again! To finish the card, I used the Inka-Gold on the die cut crosses, border, and layered sentiment.

My third card was super quick and easy. It features the 'Miracle of Easter' set, gorgeous 'Spring Flowers 2019' Paper Collection, Scalloped Ovals Dies, Ovals Dies, Scalloped Rectangles Dies, Pierced Rectangles Dies, and Bitty Borders Dies. The lily was stamped in Stazon Jet Black onto the oval panel which was sponged in yellow, then both water-colored and colored with markers. The sentiment was stamped onto a panel which was cut with the Pierced Rectangles Dies, matted with the Scalloped Rectangles Dies. Please note that both of the small rectangles were cut using the Die Re-sizing Technique to customize the length to fit the sentiment perfectly.
Thanks for hanging out with us today!
Blessings,
Hi, everyone! This week's Featured Stamper over at Splitcoast is Jessica Kruegel aka jexterra.....congrats, Jessica! I chose this adorable cupcake card from her gallery as inspiration today. For my card, two white panels were cut out with the ODBD Custom Double Stitched Rectangles Dies; on one, the 'Cupcake' single was stamped, watercolored at the bottom and sponged at the top; the largest panel was scored with a Scor-buddy. A partial piece of designer paper from the NCC 'Sweet Shoppe' Paper Collection was cut with the same die, using the Die Re-sizing Technique. A craft knife was used to cut through the cupcake so that the single candle (cut with the ODBD Custom Birthday Candles Dies) could be inserted. The sentiment was cut with the ODBD Custom Celebrate and Wish Dies. The sprinkles, embossed areas of the candle, and the sentiment were highlighted with a clear glaze pen and two red gemstones were added. I will also be submitting this card to the Fan Club Central Theme since I used scoring on the white panel and since the candle is parallel to the rectangles.

Thanks for stopping by!
Blessings,
Hi, everyone! My card today combines this week's Inspiration Challenge (I chose this beautiful autumn quilt from Studio E Fabrics) plus this week's Friday Free4All Challenge is to make either a Halloween or a fall themed card. Since I do not celebrate Halloween, I chose to make a Thanksgiving card using the ODBD Custom Quilted Background Die, ODBD 'Follow the Son' Paper Collection, ODBD Custom Double Stitched Pennant Flags Dies and the 'A-Maize-Ing' stamp set and ODBD Custom Indian Corn Die.When I use any of ODBD's Quilt Dies, I love to use my Xyron Sticker Maker which makes adhering the inset pieces a breeze! Check out my instructions below:
First, cut a cardstock panel just a smidge smaller than the die cut frame of whichever quilt die you are using. Run it through a Xyron Sticker Maker machine. (Note: I usually use the same color paper as the quilt frame but for this tutorial, I used white so that it's more visible for photos.) If you don't have a sticker maker, you could use your snail adhesive but make sure you cover the entire surface so that none of your die cut pieces fall out later.
Once your sticker is made, peel off the backing and adhere the quilt frame to the panel.
Lay out all of the coordinating die cut pieces of the chosen patterns or colors so that it's easy to locate and insert the pieces. Make sure you have a good fit before pressing each piece onto the sticker background. Tip: When using multiple colors to fill in your quilt, try to use the same order all the way around the quilt and pay attention to the pattern so that you don't have two of the same colors next to each other.
Once the quilt is complete, press down on the frame and pieces to make sure they are all adhered well. Now it's time to decorate!
For my card sample, I have used the 'A-Maize-Ing' stamp set and ODBD Custom Indian Corn Die. I wanted to used a stitched die for the sentiment to coordinate with the quilt die, but I didn't have the right size.......so......I used the die-resizing technique to create the perfect die cut. Here is how you can make any size panel you want:
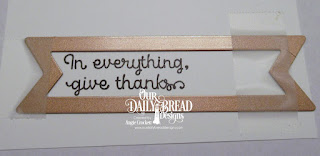


I stamped my sentiment first, then lined up the die from the ODBD Custom Double Stitched Pennant Flags Dies on one side of the sentiment. Removable scotch tape was used to hold the die in place then ran through my die cut machine. The panel was removed from the die, then lined up on the other end and taped down. (Note: if using pierced or stitched dies, make sure that the holes or the stitches line up or your finished die cut will look messy.) *****Important: when making your second cut, you only want to cut just the edge, so roll the plate just a bit and then reverse so that only the end of the panel cuts. You may emboss these types of cuts as well, just place the embossing mat and plate over half of the panel at a time.
Here is my finished card:
Thanks for visiting!
Blessings,
Hi, everyone! This week's Friday Free4All Challenge over at Splitcoast is to make a Father's Day card or a masculine card. Since my three Father's Day cards are finished, I created a birthday card for my brother-in-law who is a chaplain for the Indiana National Guard. His favorite color is green, so I combined Always Artichoke and Crumb Cake for his card. The soldier and scripture are from the ODBD set, 'Not Forgotten'; the backgrounds were stamped with the 'Rope Background' stamp; the little cross was stamped with a retired 'Stamped By Me' stamp, the Wood Fish Mini (which has three crosses...I cut one of the smaller crosses out to fit on the tiny banner.) The banners were all cut with the ODBD Custom Large Banners Dies set; the scripture panel was cut down using the die-resizing technique to make it a perfect fit for the verse. The tiny stars are from the ODBD Custom Sparkling Stars Dies set. I will also be submitting this to the 'Boys of Summer' challenge over at the CAS-ual Fridays challenge blog.

Thanks for stopping by today!
Have a blessed weekend!
Happy Saturday, everyone! This week's Inspiration Challenge over at Splitcoast is to find inspiration from the Caron's Beach House site. I needed to make a birthday card for one of my nephews and this 'Gone Fishin' wall art was just the help I needed. For my card, I started the 'Great Catch' Stamp/Die Duos set, stamped and cut out the bass and lures with the custom dies, colored the lures with markers, but water-colored the bass. I cut out a circle with the ODBD Custom Pierced Circles Dies, then sponged the scene with sponges using reverse masking and the sponged sky technique. The 'Fishing Net Background' was stamped in Versamark onto the card base and the kraft panel which was cut out with the ODBD Custom Large Banners Dies set. For the sentiment banner, I used the die-resizing technique to make the die-cut a bit larger so that the 'Gone Fishing' stamp would fit. A paper piercer was used to poke a hole in the lure so that the linen thread could be threaded through it.. The last finishing touch was to add a bit of clear glaze pen to the fish's eye.

Thanks for stopping by today!
Have a blessed weekend!!
Hi, everyone! This week's Inspiration Challenge over at Splitcoast is to find inspiration from Audrie's 'Beautiful Baskets' Pinterest Board. I absolutely LOVE the colors in this gorgeous basket! The design of this card began with the fun and colorful alphabet designer paper from the Artistic Outpost 'Vagabond Treasures' Paper Collection, which led to plum cardstock and mustard ink for sponging. This new 'School Bus Driver' set by Our Daily Bread designs is so fun! The bus was stamped on yellow and again on white so that I could cut out and paper piece the sections together. The sentiment was stamped on panels cut with the ODBD Custom Pennant Flags Dies (the top pennant was re-sized to fit the word perfectly).
Thanks for stopping by!
Blessings,


