Hi, everyone! This week's Inspiration Challenge over at Splitcoast is to find inspiration from the Shutterstock site.....I loved the monochromatic tones of this awesome forest photo. For my card, I began by creating a large panel with the Wrinkle Free Distress technique, which some are now calling the 'Smoosh' technique. Three shades of brown ink pads were smooshed onto a craft sheet, spritzed with water, then white cardstock mopped up all of the ink. Once the panel was dry, two shaped panels were cut out with the ODBD Custom Double Pierced Vintage Labels Dies, for the image panels on front and back of the flip card. The pine images from the 'Seek Me' set were inked first with Close to Cocoa, then Chocolate Chip; each time the stamp(s) were inked, they were spritzed with water before stamping. The first photo is the front of the card when folded (will fit into an A2 envelope).
This photo shows the front panel as it's being flipped open.

This photo shows the inside image/scripture panel which also was stamped with the 'Seek Me' stamp set. To match the scripture verse, 'Seek' and 'Find' banners were cut with the ODBD Custom Alphabet Flags Dies, backed with white cardstock then 'tied' together with linen thread. At the bottom of the card, a scene was created using the following ODBD Custom Dies: Curvy Slopes and Trees and Deer. Before adhering the image panels, they were both matted with the ODBD Custom Vintage Labels Dies. The card base and ODBD 'Ephemera Essentials' plaid design were all cut out with the ODBD Custom Vintage Labels Flip Fold and Layers Dies. A greeting panel was added to the back side of the card in order to write a birthday message for my Dad; the layer die used for the Seek Find panel was used to cut out the greeting panel..perfect fit! :) For the finishing touch, three 'faux brads' were added to the front corner (leftover die cut pieces from a previous project, coated with a clear glaze pen.)

Thanks for stopping by!
Blessings,
Hi, everyone! Welcome to the November New Release party for Our Daily Bread designs! Since there was an early pre-order sale on the November Bundles, you have probably seen all of the new goodies for this month, but if not, check out this post on the ODBD Blog to see them all, along with some amazing designer samples.
Here are the ODBD items used in my card sample for today:
I don't know about you, but pink poinsettias are my FAVE! The traditional red and the elegant white varieties are gorgeous, but there is something about the pink ones that really get me! So, of course I had to color my poinsettias light pink. The poinsettias and scripture verse are from the 'Joyful Christmas' Stamp/Die Duos set; the yummy designer paper is from the ODBD Christmas Paper Collection 2018. The other dies used here are the ODBD Custom Quilted Background Die, ODBD Custom Double Stitched Circles Dies, and the ODBD Custom Circles Dies. Three pink pearls and a baker's twine bow were added as simple embellishments.

Here is a helpful tip when using any of the ODBD quilt dies. Cut a cardstock panel a smidge smaller than the quilt frame, make a sticker out of the panel by using a Xyron sticker maker (or by covering the entire surface with adhesive). Carefully adhere the die-cut frame, then place the inside pieces within the frame and press down onto the sticker surface. This is the most efficient way I've found so that each individual piece doesn't have to be glued down one at a time. When finished, make sure to go over each section and press down to make sure they are adhered well. For a quick photo tutorial, see this post. Have fun!
Thanks for visiting!
Blessings,
Hi, everyone! My card today combines this week's Inspiration Challenge (I chose this beautiful autumn quilt from Studio E Fabrics) plus this week's Friday Free4All Challenge is to make either a Halloween or a fall themed card. Since I do not celebrate Halloween, I chose to make a Thanksgiving card using the ODBD Custom Quilted Background Die, ODBD 'Follow the Son' Paper Collection, ODBD Custom Double Stitched Pennant Flags Dies and the 'A-Maize-Ing' stamp set and ODBD Custom Indian Corn Die.When I use any of ODBD's Quilt Dies, I love to use my Xyron Sticker Maker which makes adhering the inset pieces a breeze! Check out my instructions below:
First, cut a cardstock panel just a smidge smaller than the die cut frame of whichever quilt die you are using. Run it through a Xyron Sticker Maker machine. (Note: I usually use the same color paper as the quilt frame but for this tutorial, I used white so that it's more visible for photos.) If you don't have a sticker maker, you could use your snail adhesive but make sure you cover the entire surface so that none of your die cut pieces fall out later.
Once your sticker is made, peel off the backing and adhere the quilt frame to the panel.
Lay out all of the coordinating die cut pieces of the chosen patterns or colors so that it's easy to locate and insert the pieces. Make sure you have a good fit before pressing each piece onto the sticker background. Tip: When using multiple colors to fill in your quilt, try to use the same order all the way around the quilt and pay attention to the pattern so that you don't have two of the same colors next to each other.
Once the quilt is complete, press down on the frame and pieces to make sure they are all adhered well. Now it's time to decorate!
For my card sample, I have used the 'A-Maize-Ing' stamp set and ODBD Custom Indian Corn Die. I wanted to used a stitched die for the sentiment to coordinate with the quilt die, but I didn't have the right size.......so......I used the die-resizing technique to create the perfect die cut. Here is how you can make any size panel you want:
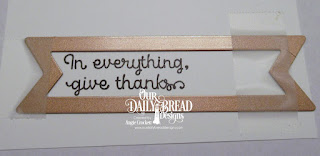


I stamped my sentiment first, then lined up the die from the ODBD Custom Double Stitched Pennant Flags Dies on one side of the sentiment. Removable scotch tape was used to hold the die in place then ran through my die cut machine. The panel was removed from the die, then lined up on the other end and taped down. (Note: if using pierced or stitched dies, make sure that the holes or the stitches line up or your finished die cut will look messy.) *****Important: when making your second cut, you only want to cut just the edge, so roll the plate just a bit and then reverse so that only the end of the panel cuts. You may emboss these types of cuts as well, just place the embossing mat and plate over half of the panel at a time.
Here is my finished card:
Thanks for visiting!
Blessings,
Hi, everyone! Our Daily Bread designs is offering Pre-Orders on the November New Release Bundles, plus bonus dies while supplies last! Check out all of the details HERE on the ODBD Blog. Shown below are photos and links to each of the bundles.
Here are the items featured in my card sample below:
My card today features the poinsettia image from the 'Joyful Christmas' Stamp/Die Duos set, a solid plus a pattern from the ODBD Christmas Paper Collection 2018, along with the ODBD Custom Alphabet Flags Dies and the ODBD Custom Large Banners Dies.
Thanks for visiting today!
God bless!


