Hi, everyone! The New Release over at Divinity Designs LLC is so epic that it will be shared through November! Since I work full time, I was only able to use a small portion of the goodies, but you can see them all HERE on the website or HERE on Instagram. Enjoy!!
My first card features the Hot Cocoa Stamp/Die Duo set, along with one of the beautiful scenes from the Silent Snowfall A2 Card Fronts pack. Other items used: A2 Pierced Triple Window, Sentiment Strips 2, Matting Rectangle, A2 Landscape Card Base with Layer, Foam Mounting Tape, Blending Brushes. Next up is another beautiful winter scene from the Silent Snowfall A2 Card Fronts, along with the Rejoice Stamp/Die Duo set. Other items used: Matting Rectangle, Mini Slimline Rectangles, Mini Slimline Scalloped Rectangles, A2 Landscape Card Base with Layer, Blending Brushes, and Foam Mounting Tape. My next card is super simple but is one of my faves. I love this peaceful scene from the Silent Snowfall A2 Card Fronts pack, with a fabulous color combo of lavender and navy! I used lavender foil cardstock for the Treat Tags Die and Ornamental Rectangle Die. Other items used: Sentiment Strips, A2 Landscape Card Base with Layer, Foam Mounting Tape. And lastly, I would like to share a fun gift bag created with the Gift Giving Goodie Bag Die Set. The leaves are beginning to show their beautiful colors here in Indiana, so I wanted to create a fall themed project. The designer paper used for the Goodie Bag layers is from the Festive Fall Slimline Paper Pad. Also featured is the new Stitched Tag Die Set and the Bitty Blossoms Dies. We will be sharing new projects from this release throughout October and November. Stay tuned! Thanks for hanging out with us today!
Showing posts with label anything but a card. Show all posts
Tuesday, October 1, 2024
Saturday, June 29, 2019
Letterboard Door Sign
Happy Saturday, everyone! This week's Inspiration Challenge is to find inspiration from Converse....I knew that they still made shoes, but had no idea of the variety! I chose these awesome sneakers as inspiration....the purple and black combo really flipped my switch! What I created is not a card but a letterboard sign for my Mother-in-law's utility closet at work. (All stamps and dies used are from Divinity Designs.) The black letterboard, letters, and lilac frame were cut with the Letter Board Dies set (available July 1st); the butterflies were stamped and cut with the Butterfly and Bugs Stamp/Die Duos set (a clear glaze pen was used to add dots to the wings before coloring as a resist agent); other dies used: Fence, Grass Lawn, and Scalloped Squares.
Thanks for stopping by today!
Blessings,
Thanks for stopping by today!
Blessings,
Saturday, February 11, 2017
Heavenly Hearts Treat Basket
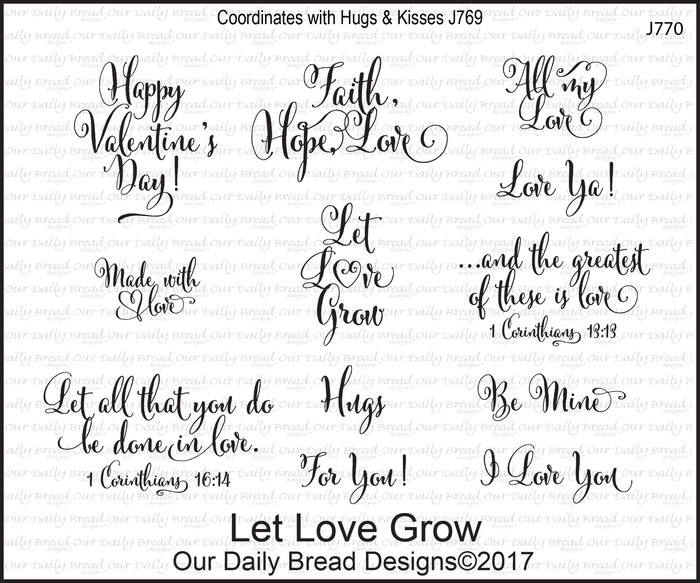
Happy Saturday, everyone! This week's Inspiration Challenge over at Splitcoast is to choose a baby item from the Spearmintlove site....I fell in love with this pink teether! I have used the ODBD Custom Heavenly Hearts Dies to create a treat basket. These dies are meant to cut out inset patterns in the sides of the new ODBD Custom Glorious Gable Boxes but I used them separately for this fun project. I cut out four panels for the sides, a square for the bottom, and the handle was created by cutting three of the rectangle patterns on a strip, then trimmed down to size. (Please click here to see the die inserts used and modified for this project.) The sides were held together with temporary tape while the inside corners and bottom were reinforced with tiny strips of cardstock. (I may have to do a tutorial later!) The sentiment from 'Let Love Grow' was stamped onto a panel cut with the ODBD Custom Mini Labels Dies. The little heart is from the ODBD Custom Layering Hearts Dies. I will also submit this to the Friday Free4All Challenge, the theme of which was 'In The Pink'.
Here is a view of the basket handle, attached to the sides with pink brads:
Here is a view of the front, which shows the sentiment panel a bit better:
Thanks for visiting with me today!
Have a very blessed weekend!
Here is a view of the basket handle, attached to the sides with pink brads:
Here is a view of the front, which shows the sentiment panel a bit better:
Thanks for visiting with me today!
Have a very blessed weekend!
Wednesday, February 1, 2017
Our Daily Bread designs February New Releases!
Hi, everyone! Welcome to the February New Release party for Our Daily Bread designs! Wow, what an amazing release this month....my designer sisters and I have fallen in love with the new dies and stamps! After all, this is the month of love! You can see the entire new release HERE!
If you'd like a chance to win some goodies, please follow the instructions below:
* Kathy * Lisa * Sandee * Dawn * Angie (me) * Julie * Cathy * * Grace * Chris * Robin * Diana * Lori * Helen * Sabrina *
Here are the new and previously released items featured in my two projects for today:
Instead of creating a treat box, I used the new ODBD Custom Glorious Gable Box Dies to make a paper lantern, which why I chose gray cardstock. After cutting out the two halves of the box, the ODBD Custom Heavenly Hearts Dies were used to cut out the pretty flourishes, then the ODBD Custom Layering Hearts Dies were used to cut out the heart openings and small white heart. Before assembling the box, I used vellum to line all of the die cut panels except for the front, so that the tea light would be visible.
The white heart on the front was stenciled in gray and the sentiment from 'To My Favorite' was stamped in black. The accent flower was cut with the ODBD Custom Bitty Blossoms Dies and ODBD Custom Fancy Foliage Dies.
The matching card was cut out with the ODBD Custom Tulip Heart Die. The shaped card was cut out with white; a gray heart was cut out with the ODBD Custom Layering Hearts Dies for the back of the card and the flourished top panel was cut with the ODBD Custom Tulip Heart Die. When gluing the top heart to the white card, I intentionally offset them so that some of the white would show through. The sentiment panel was cut with the ODBD Custom Mini Labels Dies and was stamped with a sentiment from 'Let Love Grow'.
Thanks for hanging out with me and my Sistah Sticks today!
Blessings,
If you'd like a chance to win some goodies, please follow the instructions below:
Prize Information:
Three randomly selected winners will each receive a $25 Gift Code to the ODBD Website just for commenting on the Design Team cards! You have until February 2, 2017 at 9:00 p.m. EST to leave your comments on the Designers Blogs for a chance to win! The Winners will be posted on the ODBD Blog on February 3rd, so be sure to check back there to see if you won!
* Kathy * Lisa * Sandee * Dawn * Angie (me) * Julie * Cathy * * Grace * Chris * Robin * Diana * Lori * Helen * Sabrina *
Here are the new and previously released items featured in my two projects for today:
Instead of creating a treat box, I used the new ODBD Custom Glorious Gable Box Dies to make a paper lantern, which why I chose gray cardstock. After cutting out the two halves of the box, the ODBD Custom Heavenly Hearts Dies were used to cut out the pretty flourishes, then the ODBD Custom Layering Hearts Dies were used to cut out the heart openings and small white heart. Before assembling the box, I used vellum to line all of the die cut panels except for the front, so that the tea light would be visible.
The white heart on the front was stenciled in gray and the sentiment from 'To My Favorite' was stamped in black. The accent flower was cut with the ODBD Custom Bitty Blossoms Dies and ODBD Custom Fancy Foliage Dies.
The matching card was cut out with the ODBD Custom Tulip Heart Die. The shaped card was cut out with white; a gray heart was cut out with the ODBD Custom Layering Hearts Dies for the back of the card and the flourished top panel was cut with the ODBD Custom Tulip Heart Die. When gluing the top heart to the white card, I intentionally offset them so that some of the white would show through. The sentiment panel was cut with the ODBD Custom Mini Labels Dies and was stamped with a sentiment from 'Let Love Grow'.
Thanks for hanging out with me and my Sistah Sticks today!
Blessings,
Sunday, January 1, 2017
Our Daily Bread designs January New Releases
Happy New Year, everyone!!!! Welcome to the January New Release party for Our Daily Bread designs!! This month we have new stamps, dies, and some new gorgeous designer paper to share.....see the entire new release HERE. If you'd like a chance to win some goodies from Our Daily Bread designs, follow the instructions below:
* Sandee * Dawn * Chris * Angie (me) * Lisa * Grace * Diana *
* Cathy * Julie * Robin * Sabrina * Helen * Kathy * Anita *
Here are the new and previously released items from Our Daily Bread designs which are featured in my projects today:
For my first project, I have created a basket with the new ODBD Custom Bountiful Basket Dies set, the ODBD Custom Mini Stitched Hearts Dies, Gingham Background stamp, Dresden Quilt stamp, Rex from 'You Are Pawsome', and a sentiment from 'Be Mine'. I was intimidated by the basket die set when I first saw it, however, it was easy as pie! My husband suggested that I make a basket of puppies, so I took that cute idea and ran with it! Rex is actually two-sided......after finishing one image on white cardstock, I stamped again onto a piece of vellum, colored the image, created a sticker out of it, then adhered the mirror image to the back of the cardstock. For the quilt, I stamped and colored two of them, then gently folded them to fit into the basket and sandwich the puppy in between. Once I had the folds in the right places, I glued the quilts to the puppy and the puppy to the bottom of the basket.
My second project is a bookmark on which I used one of the new Bible Journaling stamps, 'His Timing', along with the clock image from 'Time'. The top of the bookmark was cut out with the ODBD Custom Vintage Labels Dies and the little circle was cut with the ODBD Custom Circles Dies. On Monday, I will post a tutorial on how to create tags and bookmarks from any open centered cutting dies. (Pssst......anyone who comments on Monday's tutorial post will have a chance to win some goodies!)
Thanks for hanging out with us today!
God bless!
Prize Information:
Three randomly selected winners will each receive a $25 Gift Code to the ODBD Website just for commenting on the Design Team cards! You have until January 2, 2017 at 9:00 p.m. EST to leave your comments on the Designers Blogs for a chance to win! The Winners will be posted on the ODBD Blog on January 3rd, so be sure to check back there to see if you won!
* Sandee * Dawn * Chris * Angie (me) * Lisa * Grace * Diana *
* Cathy * Julie * Robin * Sabrina * Helen * Kathy * Anita *
Here are the new and previously released items from Our Daily Bread designs which are featured in my projects today:
For my first project, I have created a basket with the new ODBD Custom Bountiful Basket Dies set, the ODBD Custom Mini Stitched Hearts Dies, Gingham Background stamp, Dresden Quilt stamp, Rex from 'You Are Pawsome', and a sentiment from 'Be Mine'. I was intimidated by the basket die set when I first saw it, however, it was easy as pie! My husband suggested that I make a basket of puppies, so I took that cute idea and ran with it! Rex is actually two-sided......after finishing one image on white cardstock, I stamped again onto a piece of vellum, colored the image, created a sticker out of it, then adhered the mirror image to the back of the cardstock. For the quilt, I stamped and colored two of them, then gently folded them to fit into the basket and sandwich the puppy in between. Once I had the folds in the right places, I glued the quilts to the puppy and the puppy to the bottom of the basket.
My second project is a bookmark on which I used one of the new Bible Journaling stamps, 'His Timing', along with the clock image from 'Time'. The top of the bookmark was cut out with the ODBD Custom Vintage Labels Dies and the little circle was cut with the ODBD Custom Circles Dies. On Monday, I will post a tutorial on how to create tags and bookmarks from any open centered cutting dies. (Pssst......anyone who comments on Monday's tutorial post will have a chance to win some goodies!)
Thanks for hanging out with us today!
God bless!
Tuesday, September 20, 2016
Coffee Is Always A Good Idea!
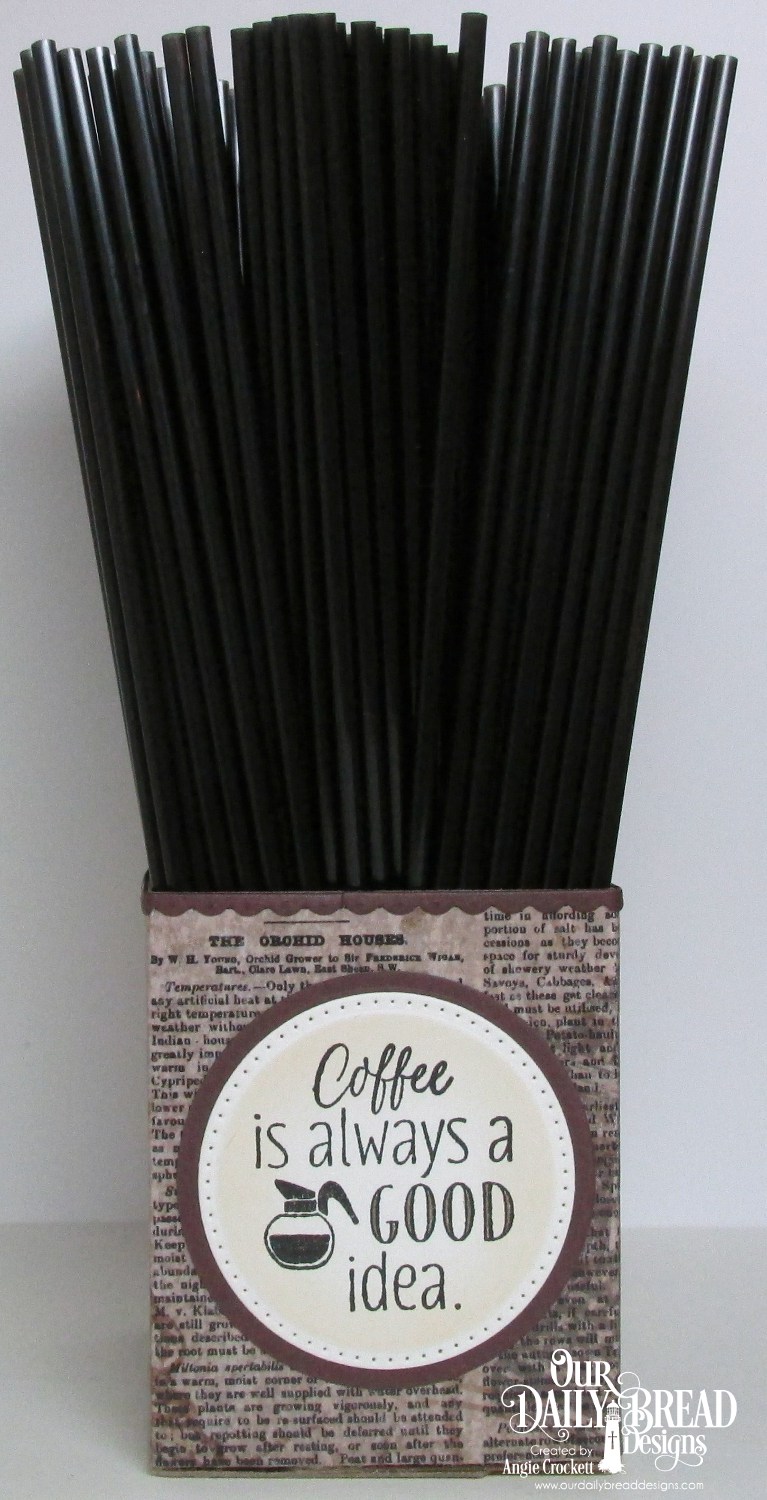
Hi, everyone! I'm sure by now that ya'all have seen the gorgeous samples by my Sistah Sticks (ODBD Design Team Sisters), featuring the new ODBD Custom Surprise Box Die? If not, you can see them in the ODBD Gallery HERE! Anyhoo.....you know me, I'm always trying to "think outside of the box" (pun intended!) when it comes to new and different ways to use ODBD's dies and stamp sets. This is one of those times. If you look at the large die which cuts out the box and flaps, picture the box upside down with the flaps (trimmed down and) folded in to make an enclosed box. I used cardboard so that it would be sturdy for the coffee station at work.
Once the box was glued together, it was decorated with a pattern from the ODBD Vintage Ephemera Paper Collection, along with the ODBD Custom Bitty Borders Dies, ODBD Custom Circles and Pierced Circles Dies. The fun sentiment is from 'I Love Coffee'.
This little box, while a bit short for the stir sticks, will be sturdy enough not to get knocked over, unlike the paper cup which is being used presently.
Here is a close-up view of the sentiment panel......I agree with this statement 100%!!!!!!
Next time I play with the Surprise Box Die, I'm going to create some bookmarks with the two long sections. One day I will make an actual Surprise Box, but I'm not sure yet when that will be....hopefully soon since I haven't tried it yet!
Thanks for visiting!
God bless!
Once the box was glued together, it was decorated with a pattern from the ODBD Vintage Ephemera Paper Collection, along with the ODBD Custom Bitty Borders Dies, ODBD Custom Circles and Pierced Circles Dies. The fun sentiment is from 'I Love Coffee'.
This little box, while a bit short for the stir sticks, will be sturdy enough not to get knocked over, unlike the paper cup which is being used presently.
Here is a close-up view of the sentiment panel......I agree with this statement 100%!!!!!!
Next time I play with the Surprise Box Die, I'm going to create some bookmarks with the two long sections. One day I will make an actual Surprise Box, but I'm not sure yet when that will be....hopefully soon since I haven't tried it yet!
Thanks for visiting!
God bless!
Friday, September 9, 2016
Altered Steno Notebook
Hi, everyone! This week's Friday Free4All Challenge over at Splitcoast is to include images of clocks in your project. This is a small steno pad which I decorated for my hubby a few years ago when he got a promotion at work. I never got around to posting it, so now is the 'time' (pun intended!). Though the images are very faint, there is a clock image from 'Time' inked in burgundy, 'stamped off' on scratch paper, then stamped directly onto the designer paper. The verse is from 'Scripture Series 2'; the 'Scrolly Borders' set has since been retired.

If you'd like to see an easy tutorial for altering notebooks like this, please click HERE.
Thanks for visiting with me today!
Blessings,
If you'd like to see an easy tutorial for altering notebooks like this, please click HERE.
Thanks for visiting with me today!
Blessings,
Subscribe to:
Posts (Atom)