Showing posts with label Product Review. Show all posts

Tuesday, April 20, 2010

"Tool Time" with Real Wood Paper

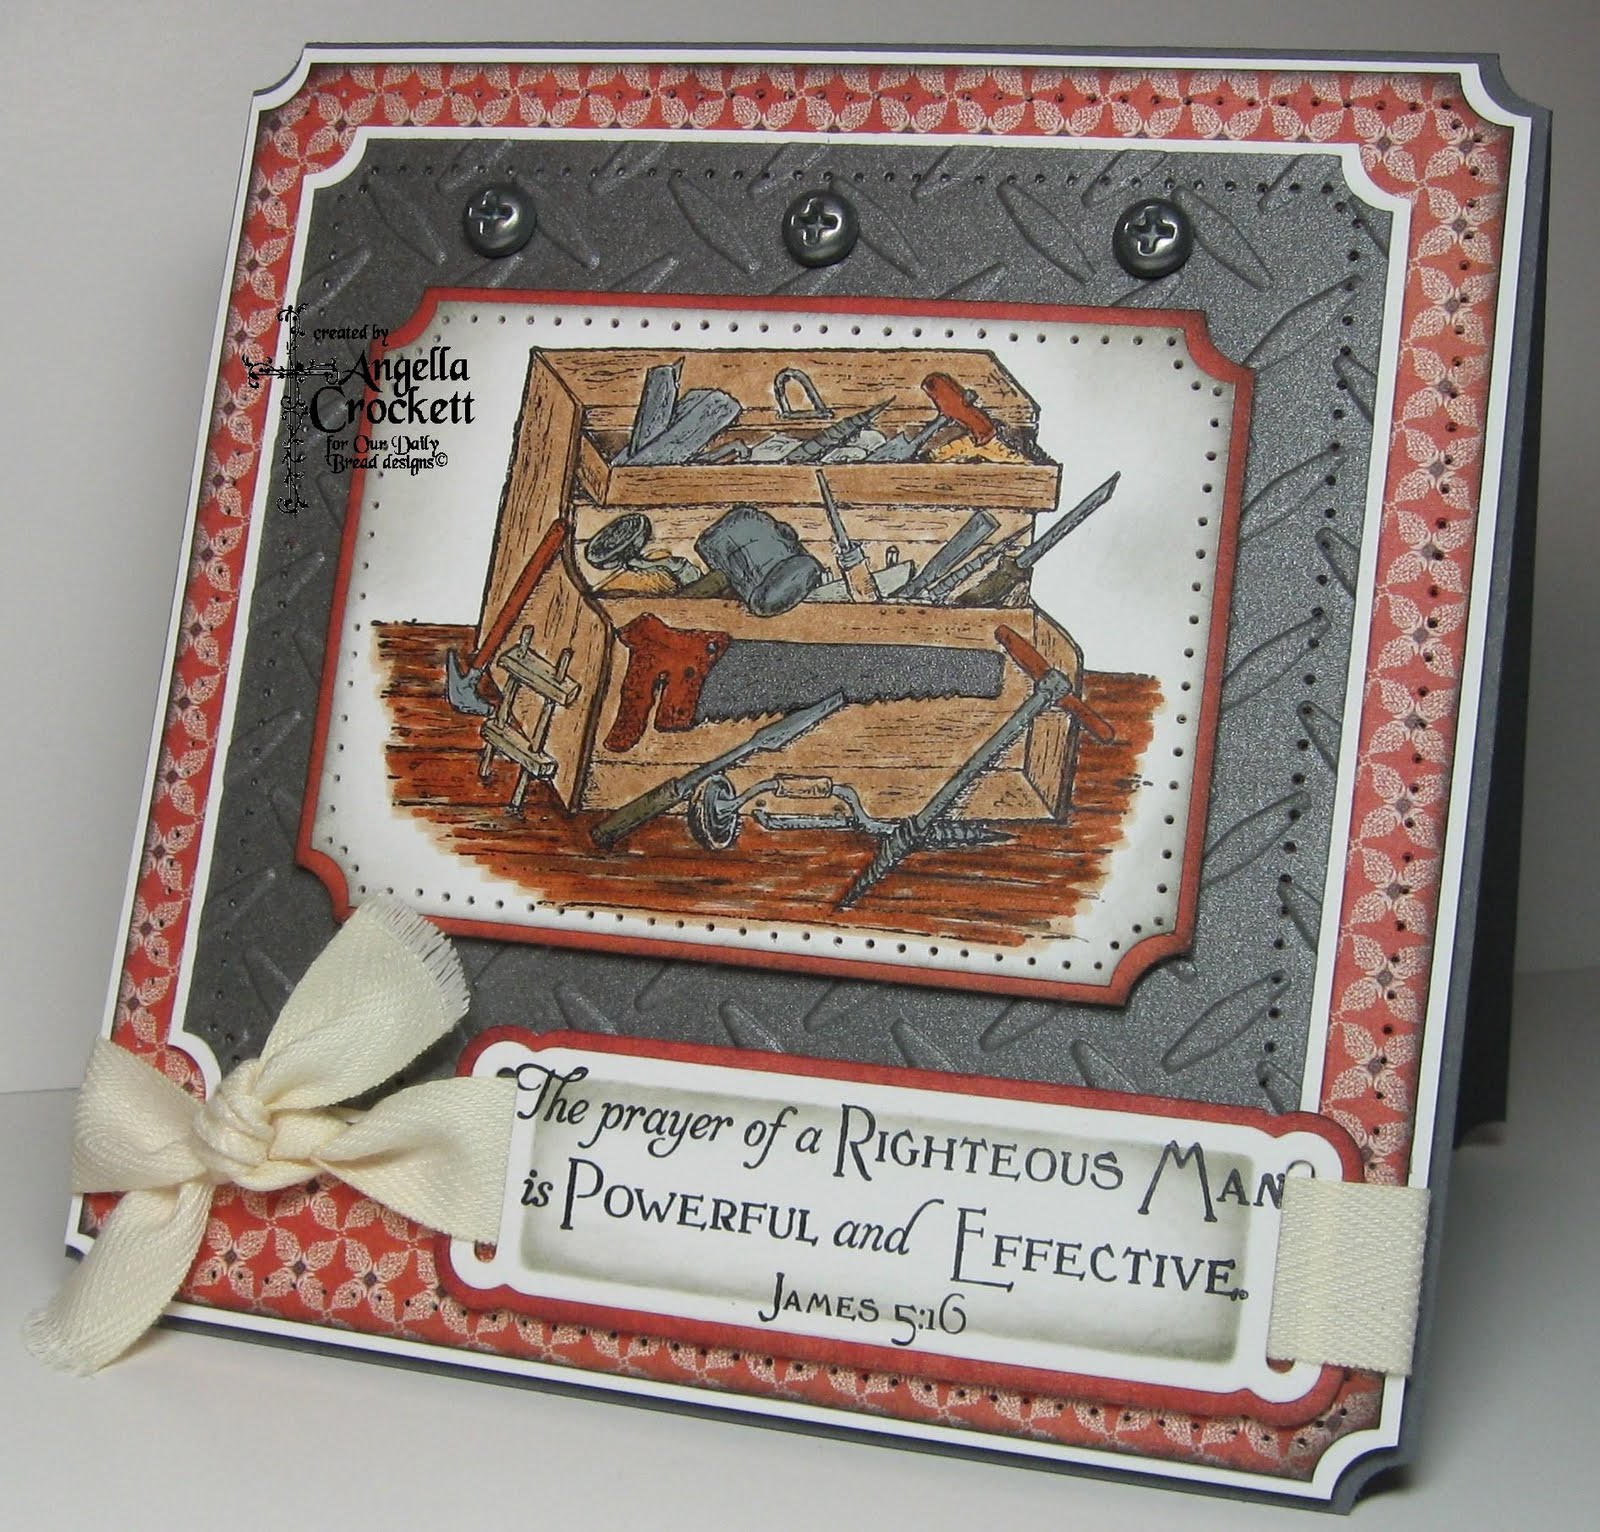
This week's Shining the Light Challenge by the Our Daily Bread designs' Challenge Team is to "Recycle It". I had this challenge in mind while I was making this card for the Our Daily Bread designs' Product Review of the "Real Wood" paper....see the Product Review HERE. The recycled item on this card is the cotton twill ribbon, which was tied around a stack of washcloths from JcPenney....sometimes the packaging is more valuable to me than the product itself! :) This is also for the Cuttlebug Spot challenge to base your project on a movie or TV show.....I believe that I have seen nearly every episode of "Home Improvement"....some I have seen over and over due to re-runs! My project is all about "Tool Time with Tim Taylor"!
The image and sentiment from the ODBD set, "Happy Father's Day" were both stamped directly onto the Creative Imaginations "Real Wood" Birch paper with Stazon; the image panel was colored with markers. The background panel is also the wood paper, embossed with a CB folder, then sponged with cocoa ink for more dimension. Since the wood paper has a think layer of paper on the back, it doesn't crack apart! Even paper piercing is a breeze. The designer paper on the bottom layer is Basic Grey "Origins" and the black pearls are by Hero Arts.

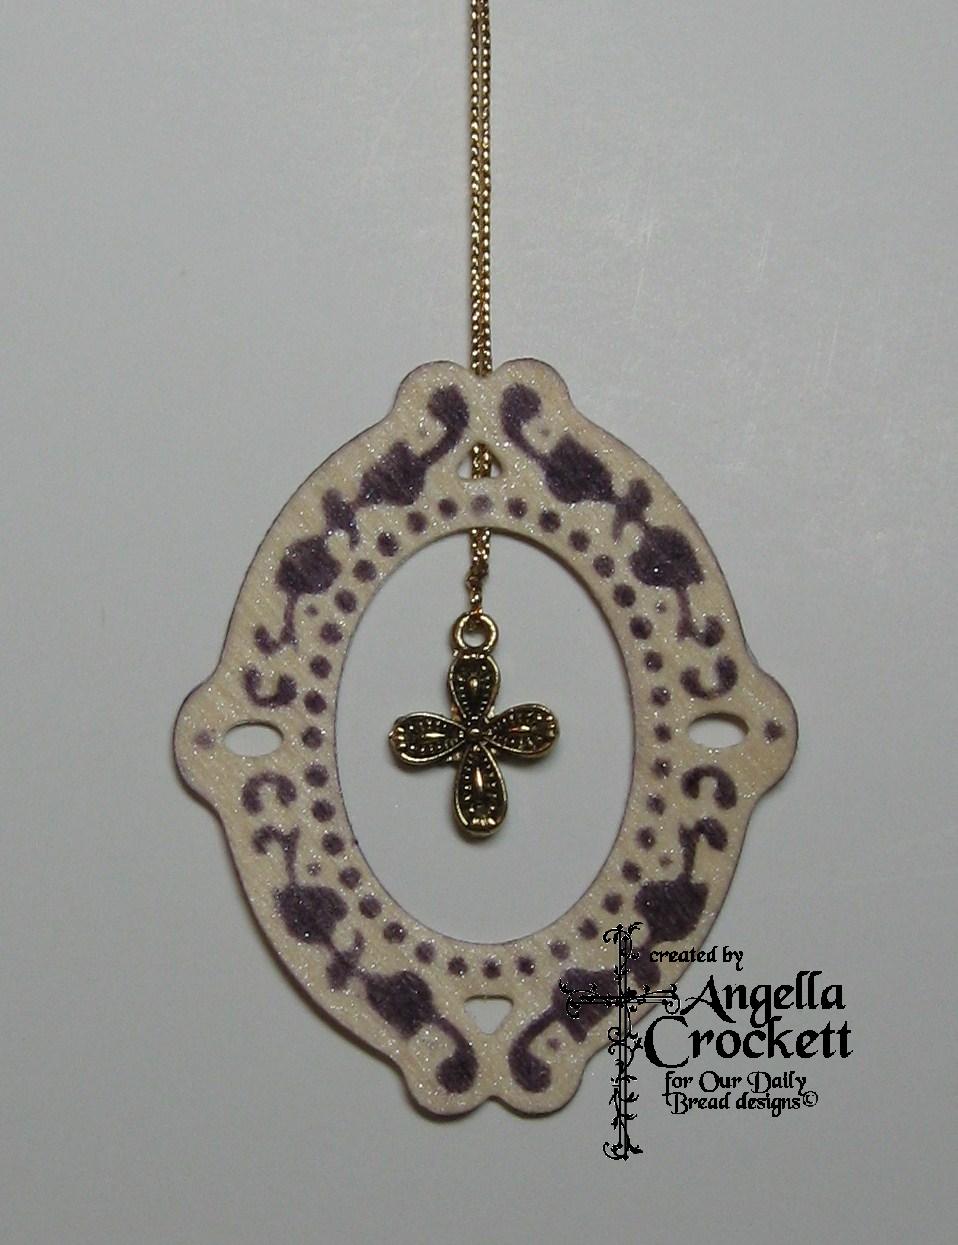
This was a fun and easy project I made using the wood paper with Spellbinder brooch set. I die-cut two of the frames, one for the front and one for the back. I sprayed each with Pearl Glimmer Mist; after they were dry, I put them back into the die and stenciled them with eggplant. (Trial and error tip: My first try was ruined since I stenciled it first, then sprayed the Glimmer after.....the ink, since it was not permanent, bled into the wood grain from the moisture in the Glimmer Mist.) Before gluing the pieces together, I tied gold cord to a cross charm and glued the pieces around it. I will either hang this from my rear-view mirror or put it on my bulletin board. I would like to try this again and use some pretty beads for a sun catcher.

Thanks so much for stopping by today!!! Have a very blessed day!!

Sunday, April 18, 2010

Oranare Template plus "Real Wood" Paper!

This week's Product Review on the Our Daily Bread designs' blog is on the awesome "Real Wood" paper by Creative Imaginations. Check out the full review here. I am using Jen's Color Monday Challenge over at Christian Paper Crafts for this as well.....pinks and browns....love it!! Also, the Technique Lover's Challenge at Splitcoast this week is PIERCING, which is my obsession!!!! Also, the OCC challenge this week is to use butterflies!!
Today I am showing how to use the "Real Wood" paper along with an Ornare Embossing and Piercing Template.
The first step is to cut a piece of the wood paper slightly larger than the template. I embossed the wood paper with the template in my Spellbinders Wizard so that the raised images would be easier to stencil.


Using a sponge dauber and SU Rose Red ink, I stenciled all of the designs of the template. I cut out the center of the wood with a square Nestabilities die since this will be a raised frame above my sentiment panel. Once the stenciling was finished I used a paper piercer and foam mat to pierce all of the holes. I cut the outside edge with an exacto knife to keep the wood grain from splintering. Helpful Hint: When cutting this wood paper around curves, using scissors will cause a few rough edges....the exacto knife worked very well for the curves. Any rough edges may be lightly sanded with a sanding block.


Here is the finished card using the wood paper ornare frame. Other supplies used: "Happy Mother's Day" set from ODBD, K & Company 'Madeline' paper, and EK Success Dotted Scallop Border Punch, Martha Stuart Butterfly Punch, Basic Grey Opaline Pearls, Lace Ribbon by Offray tied with a Bow Easy, and Pearl Glimmer Mist.


This close up shows the smooth edges which were cut with an exacto knife around the outside base of the template, and sponged with cocoa. Even the butterfly was punched from the wood paper!


Thanks so much for stopping by today!! Have a very blessed week!!!

Monday, April 12, 2010

Lovin' the Prism Metallic Cardstock

Here are a couple more items I made with the Prism Metallic Cardstock for the ODBD Product Review last week.

Along with "Ionized" Prism Metallic Cardstock (Cuttlebug'd with the "Diamond Plate" embossing folder), this card features one of Our Daily Bread designs' new sets this month, "Happy Father's Day", Basic Grey "Marrakech" designer paper, Making Memories screw eyelets, Spellbinders Ribbon Tags Trio, and May Arts Poly-twill ribbon.


My second project is a quick and easy refrigerator magnet made with the "Champagne" Prism Metallic Cardstock, Basic Grey Opaline Pearls, May Arts Satin Ribbon tied with the Bow Easy, and Spellbinders Cross Collection dies. Each layer was popped up with foam tape for dimension.


Thanks for stopping by today! Have a blessed week!!

Friday, April 9, 2010

Happy Mother's Day

Mother's Day is just around the corner, so I'm happy to be able to get a head start for once! Thanks to Kelley at Our Daily Bread designs, there are two Mom sets and two Dad sets available this month. So I'm getting a jump on Father's Day too!

This is a card I made for ODBD's Product Review on Prism Metallic Papers, which come in some gorgeous colors along with the metal tones. Check out the Product Review HERE. I used one of the bright colors, "Flame". You'll be seeing more of this paper from me...I'm hooked on the stuff!!!


The center of the card front was cut out with an Oval Scalloped Nestabilities die, and the cut out was used on the inside as the sentiment mat. The floral wreath from the ODBD set, "Happy Mother's Day" was embossed with black embossing powder, cut out with paper snips and an exacto knife, colored with markers, then popped up over the cut-out.


The designer paper is Basic Grey 'Green at Heart'; the edges punched with an EK Success Dotted Scallops Border Punch. The pearls are by Zva Creative and the satin ribbon by May Arts was tied in a triple bow with my Bow Easy.


Here is a view of the inside. The corners were punched with an EK Success Scalloped Photo Corner punch. The sentiment from "Happy Mother's Day" was also embossed in black, to match the wreath.


Thanks so much for stopping by today!!! Have a blessed weekend!!!!

Monday, December 28, 2009

CASE-ing Marcelle - Inked Cuttlebug


Hi everyone!! For the month of December, our Design Team members over at Christian Paper Crafts have each been featured for Case Artist Saturday. This card I CASED from my dear friend, Marcelle, who is also on the DT for the Cuttlebug Spot. I chose this awesome card to copy since I've been dying for a chance to try out my new "Stars" embossing folder. Today, over at the Our Daily Bread designs blog, you will see a Product Review article I wrote on the Cuttlebug embossing folders, plus some awesome samples showing different ways to use them.

For some of you, inking your embossed panels is a technique with which you are familiar, however, I thought I would show just how easy it is. Since I "exploded" my Cuttlebug machine earlier this year, here is the sandwich recommended for the Spellbinders Wizard: Bottom plate, Cuttlebug folder with paper, embossing mat, blue plate (from the Spellbinders Charm Embossing Kit). I have, in the past, used the two white plates only with the Cuttlebug folders, however, it takes a lot of force to crank the Wizard and I personally would rather not put that much pressure on it.


Once you emboss your cardstock, you can either use a stamp pad, sponge daubers, brayer, or even chalks to highlight the raised images. I used a small ink pad directly to the stars. To ensure a "clean" look, make sure your ink pad or brayer does not press into the debossed areas. I wanted a "dirty", or "rustic", look for this project, so I did not worry about keeping the ink just on the stars.


I then embossed and inked a smaller piece, in order to cut out one of the stars to embellish the ribbon. The sentiment is from the ODBD set, "Happy Birthday" ;the satin ribbon is by May Arts.

Thanks for stopping by today!!! Have a blessed week!!!

Thursday, December 24, 2009

Flower Soft Product Review

Happy Thursday!! Since our Design Team at Christian Paper Crafts has a few days off to spend with our families, there is no Bible Verse Thursday challenge today. So, I thought I would share a few projects which haven't been posted here yet. These three cards were made for Our Daily Bread designs' Product Review of the latest Flower Soft colors. You can read the full review HERE.
My first card features "Polar White" Flower Soft....perfect for any winter project. This "country church" from the ODBD set, "Worship the Lord" was perfect for a snow scene. I chose SEI paper, Spellbinders Labels Eight and Ribbon Tags Trio for the sentiment. To see how I used the Polar White in the new Flower Soft "Snow Globes", scroll down a few posts or click HERE.
My second card features "Vintage Christmas" Flower Soft and a Flower Soft Card Topper, pre-printed...ready for your sentiment and Flower Soft accents. I chose "Worship the Lord" stamp set once again, plus more paper from SEI, the Martha Stuart Doily Lace Punch and Snowflake Punch, and May Arts Sheer Ribbon.

And lastly, one of my favorite sets, "Quiet Waters" with a sentiment from "Praying for You", accented with "Autumn" Flower Soft, Basic Grey "Indian Summer" designer paper, Spellbinders Ribbon Tags Trio and Nestabilities, satin ribbon, and Dew Drops.

For more Flower Soft tips, visit Lorelie's Product Review on Flower Soft HERE.

Thanks for stopping by! Have a blessed week!!!

Friday, December 18, 2009

"Faith, Hope, Love" Flower Soft Snow Globe

Aren't these Flower Soft Display Globes the coolest?! These two cards were made for Our Daily Bread designs' Product Review of the Display Globes and Card Toppers by Flower Soft. Read the entire review HERE. This yummy paper is from Basic Grey's "Wassail" collection; the door stamp is from the ODBD set, "Ask, Seek, Knock"; the wreath was cut from a Flower Soft Card Topper and popped up for dimension; the "bushes" were punched with a Martha Stuart foliage punch, the borders punched with a Martha Stuart Doily Lace border punch; the pearls are by Zva; and the snow is Flower Soft "Polar White". Since I didn't want to cover up the gorgeous paper with a large sentiment stamp, I chose "faith", "hope", and "love" from one of the stamps in the new ODBD set called "His Gift". And for dessert, LOTS of Pearl Glimmer Mist!!! (Helpful hint: spray your papers BEFORE you add the globe to your project! I forgot and had to cover up the globe!)
This second card was made with the paper scraps from the first, plus I used a Flower Soft Card Topper on which I stamped the verse from "His Gift" and added pearls and Vintage Christmas Flower Soft.....and more Glimmer Mist, of course!!!!!

Don't forget to stock up on your Flower Soft supplies...all Flower Soft items are on sale at the ODBD store until Saturday at midnight!!

Thanks for stopping by today!!! Have a blessed weekend!!!

Saturday, October 31, 2009

A Great Big Happy Birthday "Smooch"


This is a birthday card I made for my Mother-in-law, Jean! I am so blessed to have such wonderful, loving in-laws who treat me like a daughter, not just a daughter-in-law! I chose this Basic Grey Wisteria paper since it has her favorite colors....blues and purples, plus I wanted to try out some of the new Smooch colors!! And this watering can bouquet from the ODBD set, "Happy Birthday" is so detailed and so fun to paint!!! The image was stamped with Stazon Jet Black and painted totally with Smooch Pearlized Paints. If you've never heard of Smooch before, check out the Smooch Product Review and Tutorial I did for Our Daily Bread designs.

Today's Inspiration Challenge over at Splitcoast is to use one of the GORGEOUS items from the Franz Porcelain collection.....get your drool bib ready!! I chose this gorgeous vase because of the beautiful colors and flowers. I have also used Julia's Ways to Use It challenge, to use purples on your project. Moxie Fab World has a "Plum" challenge going on until November 16th. And lastly, Alisa gave us the most awesome sketch this week over at Christian Paper Crafts, so I HAD to use it.....perfect for extra butterflies!!! Speaking of Christian Paper Crafts, we would LOVE for you to join us......what a wonderful, inspirational community there! Check out Natalie's Book of John study, Marcelle's Daily Bread devotionals, weekly paper-crafting challenges, and much more!!

Thanks for stopping by today! Come on back tomorrow morning at 8:00 EST for the ODBD Blog Hop and Scripture "Scavenger Hunt" contest!!! Have a blessed day!!!

Friday, October 23, 2009

Smooch + Crackle Accents = Icy Goodness!


This card was a total blast to make!!!! I've been trying to figure out a way to get the shimmery look of an icy pond.....with three easy steps, I "got 'er done!!" Please see the Product Review for Ranger Crackle Accents HERE on the Our Daily Bread Designs Blog for the whole enchilada! I started with watercolor paper, sponged night of navy ink, painted half of it with Moonlight Smooch, then coated the "Smooched" area with Crackle Accents. I also painted the trees and ground with Smooch for some extra shimmer and dotted it to make the snow as well. The designer paper I chose is Basic Grey "Marrakech" and the pearls are Basic Grey Opaline Pearls, which come in many gorgeous colors! This scene and sentiment are from the October ODBD release called "With Deepest Sympathy". Once again I'm going to mention how versatile the stamp sets are from Our Daily Bread Designs....I have made several non-sympathy cards from the new sympathy sets this month. Kelley does such a fabulous job at choreographing each set!!

Thanks for stopping by today!!! Stay tuned next week for some November sneak peeks!!!!

Monday, September 21, 2009

Basic Grey Buttons and Brads

These two projects were made to showcase Basic Grey's button and brad collections, which coordinate with their awesome designer papers. Please see the full product review on the ODBD blog HERE.


The first card was cut with Spellbinders Nested Butterfly dies, layered with Basic Grey "Bittersweet" paper, and embellished with matching brads. The stamps are from the "Friendship" set, new from Our Daily Bread Designs this month.

The next card came about pretty quickly once I layed my hands on the new "Lemonade" paper...which had almost every button color in it!!! I just happened to have some gingham ribbon which matched the gingham stripe in the dp. The "flower" stems were punched with a Martha Stuart foliage punch. The verse is from another new ODBD set this month, called "Get Well".

Thanks for stopping by today! Don't forget to stop by the ODBD store this week and pick up your Basic Grey buttons and brads, which, by the way, are the Super Special Sale item.....20% off until Saturday night at midnight! Have a blessed day!!